


How to fit composite wall cladding
Introduction
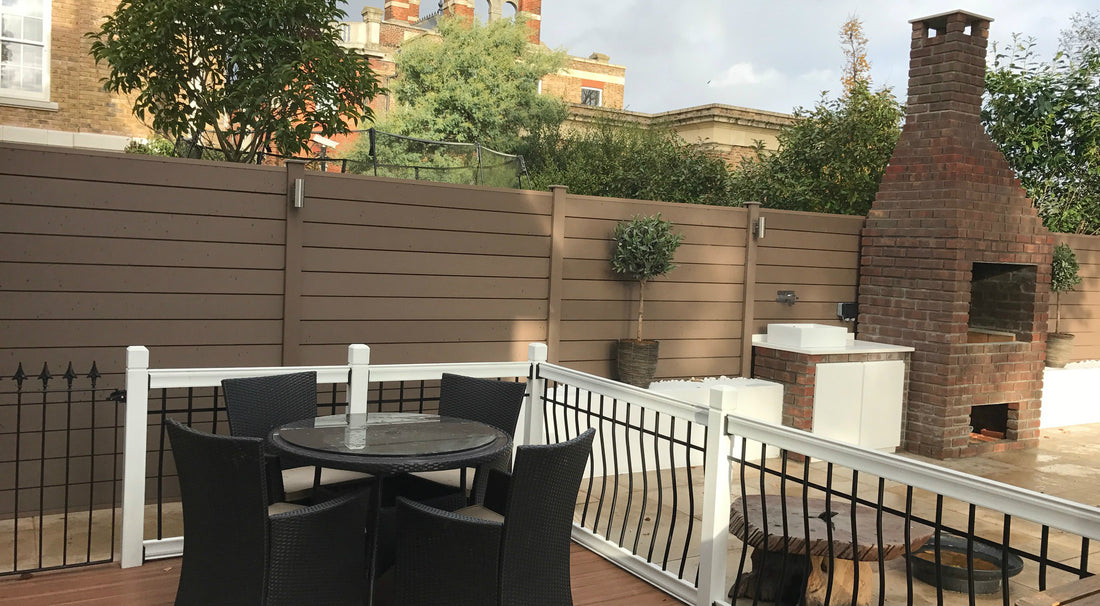
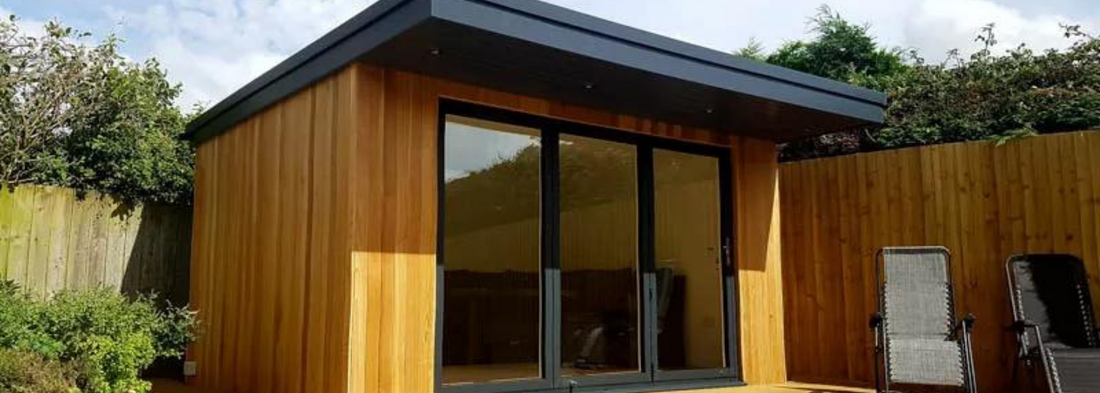
Composite wall cladding is an excellent choice for enhancing the aesthetics and protection of your walls. Whether you're looking to update the exterior of your home or give your interior walls a stylish makeover, composite wall cladding is a durable and attractive option. In this blog post, we'll walk you through the basic steps to fit composite wall cladding to your wall, ensuring a professional and lasting finish.
Materials You'll Need
Before you begin, gather the following materials and tools:
Measuring tape
Level
Screws and wall anchors
Screwdriver or drill
Adhesive (if required)
Saw (for cutting panels to size)
Pencil
Safety equipment (gloves, safety glasses)
Step 1: Measure and Prepare
Start by measuring the area you want to clad. Measure both the height and width, and then calculate the square footage. Purchase enough composite wall cladding panels to cover this area, allowing for a few extra panels to account for any mistakes or future repairs.
Step 2: Prepare the Surface
Ensure the wall surface is clean, dry, and free of any debris or loose paint. If the wall is uneven, you may want to apply a layer of plywood or other suitable backing material to create a smooth and level surface for the cladding.
Step 3: Plan the Layout
Before you start attaching the panels, plan the layout. Decide on the orientation and arrangement of the panels. It's common to start at the bottom and work your way up for a neat finish.
Step 4: Install the First Panel
Begin by attaching the first composite wall cladding panel at the bottom of the wall. Use your level to ensure it's perfectly horizontal. If needed, use wall anchors to secure the panel in place. Drill pilot holes to prevent the panel from splitting when you insert screws.
Step 5: Continue Adding Panels
Add the next panel, making sure it locks securely into place with the first one. Use screws and wall anchors as necessary, placing them evenly across the panel. Repeat this process for the subsequent panels, ensuring they are level and tightly fitted together.
Step 6: Cutting and Trimming
When you reach the end of a row or need to fit a panel around obstacles like windows or doors, measure and mark the panel for cutting. Use a saw to trim the panel to the required size and shape. Make sure to wear safety equipment during this step.
Step 7: Adhesive (if required)
Some composite cladding systems may require adhesive for added security. If so, follow the manufacturer's instructions for applying the adhesive and attaching the panels.
Step 8: Finish the Edges
To create a polished look, add corner and edge trims where necessary. These trims can also help protect the edges of your panels from damage.
Step 9: Final Inspection
Once you've attached all the panels, take a step back and inspect your work. Ensure all panels are securely attached, level, and free from visible gaps or damage.
Pioneer Cladding Installation: Important Guidelines ( important details)
Always ensure there are expansion gaps.
Maintain a minimum gap of 8 mm at board end butt joints to accommodate material expansion (or at least 0.2% of the length for trimmed boards).Leave a minimum of 20 mm gaps between board edges and adjacent walls, objects, or the ground.
Failure to provide expansion gaps may lead to board warping and void the warranty.
Pre-drill pilot holes before installation.
Use the correct-sized pilot holes to prevent splitting when screwing into all composite products.Holes in cladding boards should be at least 2 mm wider than the screw thread to allow for thermal expansion.
Avoid sharing clips between board ends.
Use a whole clip and a whole batten for each board end.Do not share clips between butt joint ends; utilise a double batten to fully support both board ends.
Utilise counter battens for vertical cladding.
Counter battens ensure proper drainage and airflow for vertical installations.Be aware of tannins and natural colour fading.
Hyperion Composites contain natural wood oils called tannins.Over a 2–12 month period, tannins are gradually washed out of the wood by rain and moisture, potentially causing water-like marks.
The speed of this process can vary with environmental conditions.
These marks are temporary and will disappear after the boards have been sufficiently wet and dried.
This natural process lightens the boards and stabilises once the tannins are fully washed out.
Storage & Handling Guidelines
To maintain the lasting beauty of Hyperion Cladding products, it's essential to adhere to these important instructions for storage, movement, and handling.
Storage:
Ensure that all products are stored flat and level, with support at 500mm intervals above the ground.
Use battens to separate and support stored cladding material, making sure they are spaced no more than 500mm apart to prevent boards from bowing.
Stack units with aligned banding and bottom supports.
Avoid stacking pallets of cladding boards more than four pallets high or exceeding a height of 3 meters.
Handling:
When removing boards from a unit, lift them and set them down gently, refraining from sliding boards against each other during movement.
For better support, carry Hyperion Cladding boards on their edges.
During construction, do not slide or drag any equipment across the boards to prevent damage.
Keep the board surfaces free from construction materials and waste to avoid potential damage.
Given the length of our cladding, we recommend that two people handle the boards during transportation.
By following these storage and handling guidelines, you'll ensure the enduring quality and appearance of your Hyperion Cladding products.
Precise Calculation of Cladding Materials
To ensure you have the exact amount of Hyperion Cladding materials necessary for your project, you have a choice between using detailed plans or following the systematic method described below. If you need additional assistance, our technical experts are readily available to support your project planning. You can reach out to them by emailing support@cladcomposites.co.uk.
Step 1: Measure the Cladding Area
The foundation of your cladding project is the accurate measurement of the area you intend to clad. Begin by measuring the height and width of the surface. It's also important to decide whether you prefer a horizontal or vertical installation. For the sake of this guide, let's assume a cladding area measuring 11 meters in width and 6 meters in height.
Step 2: Calculate the Number of Boards (Horizontal Installation)
If you opt for horizontal board installation, follow these steps:
Determine the Number of Boards in Height: Start by dividing the wall's height by the visible width of the cladding board. The standard width is usually around 120 mm (0.12 meters).
For example, if your wall stands 6 meters high: 6 meters / 0.12 meters = 50 boards high.Calculate the Total Number of Boards: To find the overall width of the cladding, multiply the wall's width by the number of boards in height (as calculated above). Then, divide this number by the length of the longest cladding board, which is typically around 3.6 meters.
If your wall is 11 meters wide: (11 meters x 50 boards) / 3.6 meters per board = 153 boards of 3.6 meters each.Remember to always round up the number of boards required to ensure you have enough to cover your wall. If the wall's width is less than the length of a 3.6-meter board, and you want to avoid butt joints across the wall, simply order the calculated number of boards based on the height.
Step 3: Calculate Total Requirements for Multiple Areas
For projects with multiple cladding areas, simply repeat the above steps for each individual area and then sum the quantities together.
Step 4: Adjust for Openings
Now, it's time to account for any openings in your cladding area, such as doors or windows. If you've chosen horizontal installation, follow these steps:
Determine the Number of Boards for Openings in Height: Divide the opening's height by the width of the cladding board, which is typically around 120 mm.
For instance, if your door stands 2 meters high: 2 meters / 0.12 meters = 10 boards high.Calculate the Total Number of Boards Required for Openings: Multiply the opening's width by the number of boards in height (as calculated above). Then, divide this number by the length of the longest cladding board (usually 3.6 meters).
If your door is 0.80 meters wide: (0.80 meters x 10 boards) / 3.6 meters per board = approximately 2.22 of the 3.6-meter boards.Round down and subtract this amount from the total cladding board count. For example, if you initially calculated 153 boards, after removing the door requirements, you'd need approximately 151 boards.
Step 5: Allow for Waste
To account for possible waste, miscalculations, and any unexpected needs during the installation process, it's advisable to add approximately 5% extra material to your total cladding board count.
Step 6: Consider Additional Materials
Depending on the specifics of your project, you may require additional materials:
Battens/Joists: Plan for approximately 9 linear meters of battens per every 5 square meters of cladding area.
Fascia Boards and Corner Nosing Trim or Edge Boards: Allocate 2 lengths of these materials per every 5 square meters of cladding.
Fixing Screws: Typically, you'll need 7 screws per cladding board, assuming 600 mm batten centers.
Please bear in mind that these recommendations are general approximations and can vary based on your specific project. For more complex designs and unique features, creating a scaled drawing can help you determine the precise quantity of cladding boards and accessories required for your project. It's essential to consult with your supplier or contractor for accurate and project-specific recommendations.
Spacing and Expansion Gap Guidelines
To accommodate the natural expansion and contraction of materials due to temperature changes, it is crucial to adhere to the following spacing and gapping requirements for all Hyperion Cladding products:
Ensure that butt joints have a minimum gap of 8 mm when using 3.6 m length boards. When boards are cut or trimmed, the expansion gap should be a minimum of 0.2% of the length of the board.
When using plastic lumber battens for butt joints, maintain a gap of at least 20 mm from end to end.
A minimum gap of 20 mm is necessary when cladding butts up against walls or other fixed objects.
Maintain a minimum gap of 20 mm between the lowest edge of the cladding board and the ground surface.
To allow for proper air ventilation and drainage of rainwater, ensure that a cavity of no less than 38 mm is in place.
Scenario: You are installing Hyperion Cladding on the exterior of a building, and you need to ensure proper spacing and expansion gaps to accommodate temperature-related material expansion and contraction.
Butt Joints with 3.6 m Length Boards:
You have a series of Hyperion Cladding boards, each measuring 3.6 meters in length.When installing these full-length boards, make sure that the butt joints between them have a minimum gap of 8 mm. This allows room for the boards to expand or contract as temperatures change.
Trimmed Boards:
In some areas of the building, you need to trim the Hyperion Cladding boards to fit specific dimensions.If you trim a board, remember that the expansion gap should be a minimum of 0.2% of the length of the trimmed board. For example, if you trim a board down to 3 meters, the expansion gap should be 0.2% of 3 meters, which equals 6 mm.
Plastic Lumber Batten Butt Joints:
In some places, you're using plastic lumber battens to secure the cladding.Make sure there's a gap of at least 20 mm between the ends of the battens where they meet, providing space for any expansion or contraction.
Abutting Walls or Fixed Objects:
The cladding is adjacent to walls or other fixed objects.Maintain a minimum gap of 20 mm between the cladding and the adjacent structure to allow for movement.
Lowest Board Edge and Ground Surface:
The lowest edge of the cladding is close to the ground.Maintain a minimum gap of 20 mm between the lowest edge of the cladding board and the ground surface to prevent direct contact with the ground.
Air Ventilation and Rainwater Drainage:
To ensure proper air ventilation and drainage of rainwater, create a cavity with a minimum width of 38 mm behind the cladding.This cavity allows for the circulation of air and drainage, which is crucial for the long-term durability of the cladding and the building's structure.
Planning Cladding Support Structure
Hyperion Cladding may be fixed to a property using the following methods: Preferably screwed to battens attached to sub-frame battening that is fixed separately to the wall Screwed to battens fixed directly to the outer wall once a waterproof membrane/vapour barrier and noncompressible insulation is in place For uneven or non-load bearing walls, the cladding may be fixed to battens on a self-supporting frame
Guidelines for Fixing Hyperion Cladding
Hyperion Cladding can be securely installed using either Recycled Plastic Battens or Treated Timber Battens. Here are essential guidelines to follow for a successful installation:
-
When attaching battens, it is essential to secure each batten in a minimum of three places to ensure stability and proper support.
-
Avoid using plastic battens for general construction purposes. They are better suited for specific applications, such as cladding installation.
-
To facilitate adequate air ventilation and unobstructed drainage of rainwater that may seep through the cladding, it is imperative to have a ventilation cavity with a minimum width of 38mm. To achieve this, utilize battens that are at least 38mm thick to maintain the required gap behind the cladding boards.
-
If you opt for timber battens, ensure they have been pre-treated through an industrial process in accordance with BS8417. Specifically, adhere to a Class 3 application, following the Wood Protection Association Commodity Specification Code: C6 (NBS as Z12/120). This treatment is essential for long-lasting protection against various environmental factors.
-
To prevent insects from infiltrating the cavity, it is advisable to employ insect mesh on cavity openings. This will help maintain the integrity of the cladding and safeguard against unwanted pests.
Installation of Cladding Support Battens
When installing support battens for cladding, it's crucial to follow these guidelines for a successful and reliable setup:
-
Spacing and Ventilation:
- Ensure that the support battens are placed at a maximum of 600mm intervals on the supporting wall or structure. This ensures even and secure support for the cladding
- Maintain a ventilation cavity with a minimum width of 38mm behind the cladding. This gap allows for proper air circulation and unrestricted drainage of rainwater.
- Consider a double batten structure under cladding board joints to provide added stability
- For additional support and stability, add extra battens around the edges of the wall
-
First Batten Placement:
- Install the first batten at a minimum distance of 20mm from the ground. This will prevent the need for a starter tray.
-
Fixing Battens:
- Use screws to secure the battens in place. Position the screws at maximum 600mm centre for optimal stability.
- Ensure that all battens are level with the wall surface. Use packers where necessary to achieve this levelness.
-
Double Batten Structure:
- For the ends of cladding board joints (butt joints), it's recommended to install a double batten structure. This double batten system provides additional support and rigidity where boards meet.
-
Consult a Building Professional:
- It is advisable to consult with a building professional regarding vapour barriers and insulation for your specific project. Their expertise can help ensure that your installation is well-suited for the environment and requirements of your building.
-
Vapour Barrier Consideration:
- If a vapour barrier is a part of your project, make sure it is breathable and positioned behind the battens. This setup allows for a minimum 38mm airflow to maintain the cladding's durability.
Installation: Horizontal Cladding
Before You Start Hyperion Pioneer Cladding boards can be installed using screws alone (option 2), however for extra security you can also install the cladding using starter fasteners on the first board (option 1). Please note Edge boards must be fitted before you install cladding
Option 1: Installing the First Cladding Board Using Starter Fasteners
This option is for those who choose to employ starter fasteners for their cladding installation. Please follow these steps:
-
Preparing for Starter Fasteners:
- If you plan to use starter fasteners, mark level lines on the battens for their installation. It is recommended that the bottom of the starter clip is positioned 30 mm or more above the ground surface. This ensures that the cladding board will be positioned at a minimum of 20 mm above the ground
-
Starter Clip Installation:
- Ensure that the starter clips are level.
- Install one starter clip per batten.
-
Installing the Cladding Board:
- Once the starter clips are in place, slide the cladding board into the clips.
- Secure the top of the board by pre-drilling the screw holes in the cladding board. These holes should be 2mm wider than the thread of the screws used to allow for material expansion. Align these holes with the supporting battens.
- Fasten the cladding board to the batten using screws with a maximum head thickness of 2mm. Be cautious not to over-tighten the screws.
Option 2: Installing the First Cladding Board Without Clips
This option is for those who prefer not to use starter fasteners and find the Pioneer composite cladding boards sturdy enough to be installed without them. Here are the steps to follow:
-
Preparing for Cladding Installation:
- Mark level lines on the battens for the first (lowest) board to be installed, ensuring that the board will sit at least 20mm above the ground surface
-
Securing the Cladding Board:
- Pre-drill the screw holes in the cladding board, making them 2mm wider than the thread of the screws used to accommodate material expansion. These holes should align with the supporting battens.
- Place the bottom cladding boards in their designated positions.
- Attach the cladding board to the batten using screws with a maximum head thickness of 2mm. Be careful not to over-tighten the screws.
Option 2 is suitable for those who find that the Pioneer composite cladding boards do not require starter fasteners for their installation. Follow these steps to securely install your cladding without the use of starter clips.
Adding the Finishing Touches to Your Installation
In the final stages of your cladding installation, you'll want to consider the following finishing touches for a polished and complete look
Covering Expansion Gaps:
- For horizontally installed cladding, use a Hyperion Fascia Board to neatly cover the top cladding board's fixing groove.
- Cut the Hyperion Fascia boards to the required size.
- Position the fascia board over the groove of the top cladding board.
- Pre-drill through the board and create a countersink.
- Secure the fascia board in place using countersunk A2/A4 Stainless Steel screws.
Covering Cladding Board Expansion Gaps (If Required):
- If necessary, you can utilize Hyperion Fascia Boards to cover any expansion gaps between the cladding boards.
- Cut the Hyperion Fascia boards to the appropriate size.
- Place the fascia board over the expansion gap to conceal it.
- Pre-drill through the board and create a countersink.
- Secure the fascia board in place.
Covering Corners and Edges:
- To achieve a professional finish, install Hyperion Corner Nosing Trim to cover corners and edges.
- Cut the Hyperion Fascia boards to the desired size.
- Position the trim over the corner or edge to be covered.
- Pre-drill through the trim and create a countersink.
- Secure the trim in place.
Additionally, if there are any openings that lead to the ventilation cavity, it's advisable to install insect mesh to prevent unwanted pests from entering.
These finishing touches not only enhance the aesthetics of your cladding but also contribute to the longevity and overall quality of your installation. Follow these steps to achieve a clean and polished result for your cladding project.
Preparing for Doors, Windows, and Fascias: Before You Start
Before commencing your cladding project around doors, windows, and fascias, it's essential to consider some key factors to ensure a successful installation. Here are the initial steps to take into account (refer to fig.21, fig.22, and fig.23):
Additional Battening Requirements:
- When working around doors and windows, you may need to add extra battens for additional support. The specific amount of battening required may vary based on your chosen finishing option (as illustrated in fig.21).
- It is advisable to use fascia boarding in places where horizontal cladding meets a roofline, window ledge, or any location where it butts up against a horizontal edge or barrier.
Option 1: Utilizing Hyperion Fascia Boarding
Hyperion Fascia Boarding is an excellent choice for covering the edges of cladding boards and framing window areas. This option can also be combined with corner trim around windows and doors. Here's how to go about it:
-
Measure and Prepare Fascia Boarding:
- Determine the amount of fascia boarding needed and cut it to the required size.
-
Position the Fascia Board:
- Place the fascia board over the desired area. Ensure that the edge of the fascia board aligns flush with the cladded surface (as shown in fig.22).
-
Pre-drill and Secure:
- Pre-drill holes and create countersinks in the fascia board.
- Secure the fascia board in place using screws.
-
Utilize Corner Trim (If Desired):
- If desired, corner trim can be added over the fascia boards for a more finished and refined look around windows and doors.
Using Hyperion Corner Trim
To achieve a clean and polished look with Hyperion Corner Trim, follow these steps:
-
Measure and Cut Trim:
- Measure the required amount of Hyperion Corner Trim and cut it to the appropriate size for your installation.
-
Mitre at 45 Degrees (If Applicable):
- If you are placing two pieces of Corner Trim next to each other at wall edges, mitre the ends at a 45-degree angle for a seamless fit.
-
Position and Pre-drill:
- Place the Corner Trim over the corner or edge you wish to cover.
- Pre-drill holes through the trim to create screw holes.
-
Secure in Place:
- Screw the Corner Trim into place through the pre-drilled holes and ensure it is securely fastened.
-
Concealing Screws (Optional):
- If you have concerns about visible screws, consider using colored screws and screw caps. These can be obtained from general builders' merchants to create a more polished look.
Combining Corner Trim with Fascia Boards (fig. 26):
- Corner Trim can be effectively combined with Fascia Boards to cover deeper window and door frames, enhancing the aesthetics and providing a professional finish.
Option 2: Using Hyperion Corner Trim
Hyperion Corner Trim can be used on its own or in conjunction with Hyperion Fascia Boards to cover cladding board edges and exposed substructure at corners, doors, and window frames.
Soffit Installation:
- Soffit installation can be more complex and should be tailored to the specific requirements of your building. Carefully measure the length and width of each board for the section you intend to install.
- Use a starter fastener to ensure a secure installation (refer to page 10).
- Follow the instructions on page 12 or 13 for drilling the cladding boards into the soffit area as you install them, taking care to pre-drill as needed for secure attachment.
Maintenance Guidelines for Hyperion Products
Properly caring for your Hyperion products will help maintain their appearance and durability. Here are some essential maintenance tips:
Cleaning Methods:
- With the appropriate safety precautions, you can clean Hyperion products using either soapy water and a soft bristled brush or a power washer (recommended maximum 1500psi pressure). Always spray in the direction of the boards' grain and use a fan tip nozzle, keeping a minimum distance of 6 inches from the surface. Ensure you use the right cleaning product.
Dirt & Grime:
- Regular cleaning of your Hyperion products with soapy water is often sufficient to combat dirt, grime, and mildew build-up. While Hyperion products are designed to inhibit mildew growth and staining, mildew stains can occur in moist or pollen-rich environments.
Spot Stains:
- For many stains, cleaning with soap or a household de-greasing agent and warm water can effectively remove them. Promptly scrub and soak the affected area and rinse with warm water. For more stubborn stains, consider using a composite-specific cleaner for enhanced stain removal. In rare cases, you may need to lightly sand the affected area with coarse sandpaper (60-80 grit) for Pioneer range products only.
Note on Stain Removal:
- Cleaned or sanded areas may appear lighter initially and will typically regain their original appearance within 8-10 weeks, depending on the location and specific application. Hyperion products may, like any wood-based product, experience Extractive Bleeding (known as tea staining), causing temporary discoloration that naturally fades with time.
Scrapes & Scratches:
- Surface scratches and abrasions will naturally fade over time due to weathering. To remove scrape and scratch marks, use a wire brush or coarse 60-80 grit sandpaper (for Pioneer range products only). Brush or sand in the direction of the product's grain until the mark disappears. The treated area will weather back in approximately 8-10 weeks.
Painting & Staining:
- While EnviroBuild does not guarantee or recommend applying paint or stain to Hyperion products, it is possible. Wait until the product has completed its weathering process and ensure you have a clean, dry surface before applying any paint or stain. Always follow the manufacturer's application instructions when using paint or stain products.
By following these maintenance guidelines, you can keep your Hyperion products looking their best and prolong their lifespan.
Conclusion
Fitting composite wall cladding to your wall is a rewarding DIY project that can transform the appearance and functionality of your space. With the right tools and careful attention to detail, you can achieve a professional-looking finish that enhances the beauty and durability of your walls. Remember to follow the manufacturer's guidelines and safety precautions throughout the installation process, and enjoy your newly clad walls for years to come.
DISCOVER MORE
